Building a good foundation…

Hey everyone! Right about now my face has finally shifted from Quasimodo but sadly on to David Coultard. For those of you that didn’t know, I had my wisdom teeth removed on Monday. I’ve said it before but, I had so many people wishing me luck and a speedy recovery so, thank you again. To keep me from going around the twist I came up with heaps of things to keep me occupied which didn’t include taking pictures of my face! But honestly this is the first time I’ve felt like looking at a computer screen!! Fasting for 24 hours and having mouth surgery to remove significant teeth in chewing means it’s difficult to eat. Mix that with a load of medication and it leaves one a but out of sorts. However I am currently clutching my first cup of tea in 4 days… So I must be better!

But enough about me. As we move from season to season I love the transition of matte to dewy foundation! And I love a dewy foundation, Chanel vitalumiere was one of my all time favourites to use on customers, but on me foundations ALWAYS tend to go really shiny. Until now…

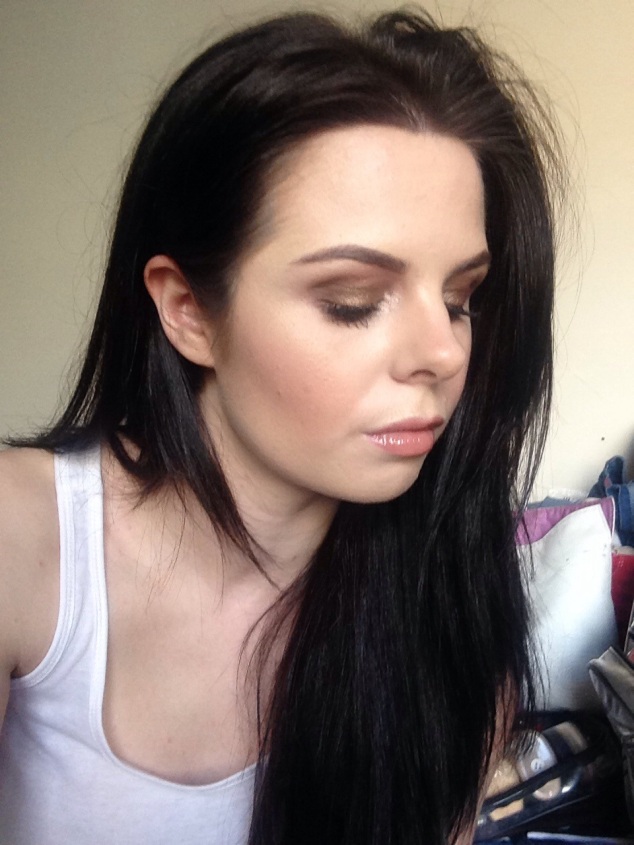
I first came across this foundation using it on a customer as her own foundation. Le teint touché éclat foundation from YSL gives a gorgeous dewy finish to the skin and wears really well, leaving a healthy glow all day. I tried this with a foundation brush and have to say I actually got a better finish using my fingers. It doesn’t have the same wet texture that other dewy foundations have which makes it lovely to use with just fingers. I still use a light dusting of powder to set my nose as this is what goes shiny first. I’ve been using shade B10 obviously the palest… But be warned I found this foundation darkened as it settled into the skin so if you do give this foundation a thought try before you buy!

20140417-083914.jpg

But for those of you who are matte matte matte powder powder powder!! I have also discovered this…

20140417-081412.jpg

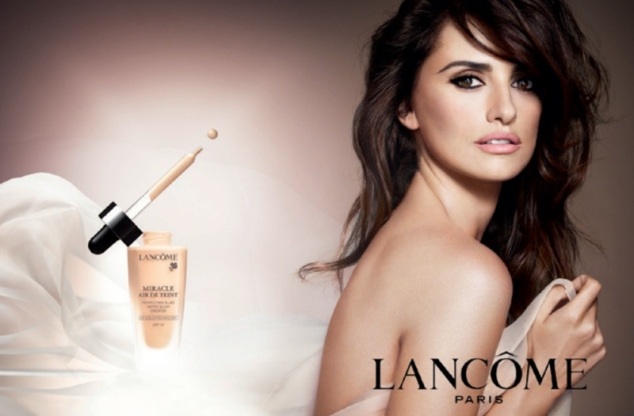
I have never felt a texture like this before in my life! And as much as, when it came to foundations, the dewy side had me hooked this brought me crawling back to the matte side!! It literally feels like as it says “air”. The completely weightless liquid foundation immediately dries to a matte finish leaving a completely invisible flawless finish. Lancome have really came up trumps with this little beauty and let’s face it, anything that could have me looking like Penelope Cruz jumps straight into my make up bag!

20140417-083454.jpg

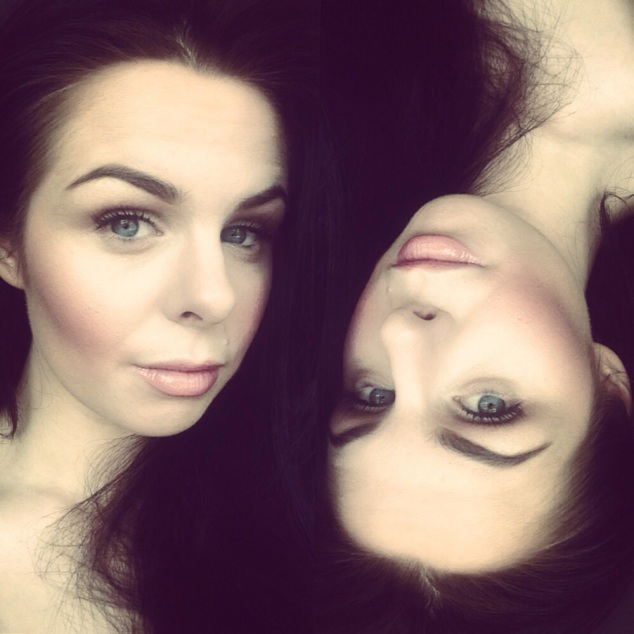
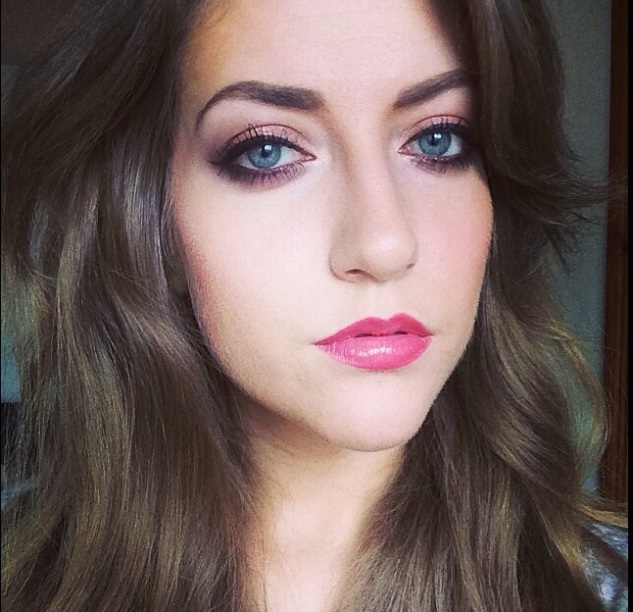
I have been on a little bit of a foundation frenzy and I stopped myself from purchasing this next little beauty so I was super chuffed when another MUA sister ,Chloe, purchased it and kindly told me all about it! The Make Up Forever HD foundation is huge in America at the moment and is a keen favourite in the likes of Kim Kardashian’s make up artist Mario’s make up kit. I’ve always been drawn in by its apparently flawless, full “HD” coverage. The highly talented Chloe has kindly allowed me to link her Facebook page so you can all have a read of what she thought on it. (Of which it is well worth.. I now also want this foundation… See face below… Why wouldn’t you??)

20140417-083356.jpg

http://facebook.com/ChloeMarieMUA

Whether you’re a matte or a dewy, full coverage or natural a good foundation is something you should spend your money on. Cheap lipglosses and eyeshadows will always do the job but there is nothing better than having healthy skin and I do believe this is where spending a bit more money comes in to play. People always ask my the What’s,Where and Whys of buying foundations and I would always say…

What; buy a foundation that matches your skin type. If your skin tends to have drier tendencies choose something with a dewy hydrating finish which will boost radiance and not stick to any drier areas. If you are more shiny stick to more variable matte coverages and finishes. Always remember though that heavier foundations can sometimes show up uneven skin more than a natural coverage… Concelear will be your saviour here!

Where; do your research! There are so many blogs you can troll through giving you amazing tips depending on your budget. Always sit down and trial the foundation with the consultant or if you are uncomfortable with this ask for a sample. Your foundation will darken and change in outside lights so it’s best to get a feel for it all over before you buy (you are visualising your drawer full of foundations right!) especially when purchasing something a bit more on the expensive side.

Why; test multiple colours. Foundations have different tones and seeing them next to each other can be helpful in eliminating what doesn’t match your skin. Consultants are trained to match skin tones and here is where I’m their worst customer. I prefer a more yellow based foundation to give me warmth because I am as pale as. So testing out the different shades will let you see what I mean by pink or yellow based. Try them in areas that have no interference to your natural colour such as in the inner arm and under the ear on your neck.

I always hope my blogs help in making your shopping trips less traumatic! And I’m always open to hearing suggestions if there are particular things you want to know. As always give the Facebook (StephMArtistry) I didn’t realise how tantalisingly close I am to 800 linkers which is beyond awesome! You can also follow @stephmartistry on twitter an Instagram for somemore rambling, BTS, selfies and all around MUA banter.

Until next time ciao! x

Courage and contouring…

Hello hello!

I hope you are all well, things still remain busy busy at StephM.Artistry (not that I’m complaining😊) but this weekend took a bit of an emotional turn for me and so before we get to the fun stuff I wanted to share with you all 6 amazing women I had the pleasure of spending yesterday with.

20140331-190744.jpg

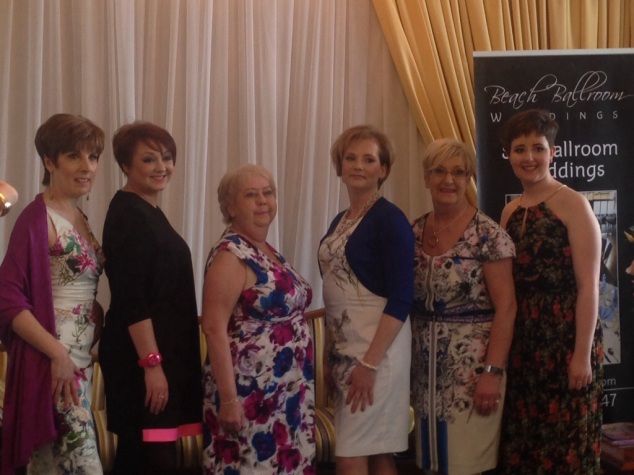
From left to right let me introduce you to Janet, Gill, Tina, Lisa, Sandra and Katy… 6 of the most incredible women I have had the pleasure working with. Yesterday I volunteered, helping backstage, for Friends of Anchor at their Courage on the Catwalk. These women are recovering cancer patients and to mention a few of their stories will show you just how brave they are. Sandra has had 3 cancer diagnoses. Gill, her mum and dad were all diagnosed within 6 months of each other. Katy is celebrating her 19th birthday this Friday after being diagnosed last year. I know… Friends of Anchor is such a good cause raising over £60,000 yesterday. This goes towards researching cancer treatments and even simple things such as tea and cake to make these women smile while they receive their treatments. Yesterday was the most fun. I spent the day laughing, cuddling and sobbing… And maybe a little bit of make up-ing…

20140331-191956.jpg

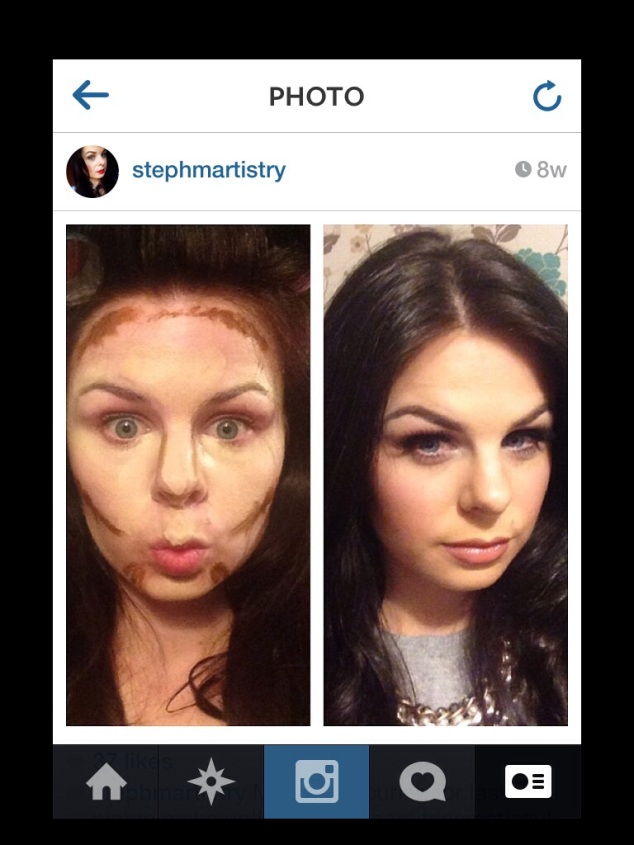
Right, now you’re all crying along with me! I wanted to go a little bit more into depth regarding a wee contouring video I did recently. For those of you who do not follow me on Facebook or Instagram where the video was featured see links below;

https://www.facebook.com/pages/StephMArtistry/175542622557392?ref=tn_tnmn

@stephmartistry on Instagram

Contouring is really popular right now (hey, who doesn’t want amazing cheekbones??) and that video shows my favourite way of contouring.

Step 1 I apply my regular foundation, just a small amount to act as a base. Right now I’m using YSL le teint touché éclat and I am loving it
Step 2 is my under eye concealer, I use MAC Prolongwear in NC15 it’s a shade/2 shades lighter than my skin so it brightens and this stuff totally sticks under the eye it’s the shiz…
Step 3 I like using the MAC prep and prime in light boost to highlight all the high points on my face… Generally the cheekbones, over my brow bones, over my t-zone, Cupid’s bow, chin and jaw line.
Step 4 I add a foundation that is two shades darker than my skin and this goes where I want natural shadow, so along my hair line, under my cheek bones and bottom lip.
Step 5…. I blend like a mo fo!! (Real techniques expert brush is great)

At this point, as all products I have used have been cream/liquid based, it makes everything much easier to blend making it look really natural. These next steps are for those that are a bit more like me.. All the make up… All the time!

Step 6… I use a powder bronzer on a smaller powder brush and really carve the cheekbones to add more sculpting.
Step 7 and I use the Nars albatross highlighter to go over all the high points.

I add my regular blusher and powder (Dainty by MAC and Ben Nye loose in cameo) and hey presto… Cheek bones ahoy!

You can change the effect using these steps too. Depending on how dramatic you want the contour to be can depend on how dark and light you go with your light and shadow colours(see below). But using creams to contour makes it so much easier.

20140331-195900.jpg

I hope this helps, I always love sharing these little tit bits with you so if there is anything you would like to particularly see just holla! I’m working on a brow one as I know this is something one or two of you are interested in 😉

Until next time! 💜

Leading ladies…

Well it’s been a while…. I have been so busy folks and I apologise! I know so many of you tell me that you love my blogs and I’m so sorry I haven’t been keeping up with them. If an excuse could be tolerable, I will say… StephM.Artistry has been so busy. I don’t know what has happened or who flicked a switch but I have literally been out the door to the point my books are pretty much full until July! So researching blogging materials (or even getting a chance to sit down and write one!!) has been a struggle.

But really it’s not been that difficult recently! With all these award ceremonies my make up envy has been going into overload! Each time I refresh my Instagram news feed it makes me reach for my make up brushes. So I thought I would break down some of the key trends and some of the leading ladies that absolutely rocked them!

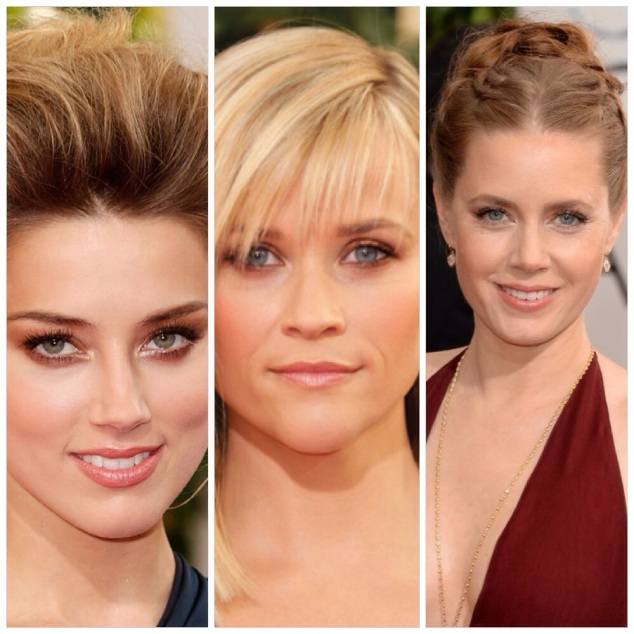
This year was all about skin. In every look fresh skin was so big! “The Golden Goddess” was a massive trend and makes fresh skin so much easier to achieve.

20140303-185139.jpg

From left to right Amber Heard pulls off a much more smokey, blown out version with Reese being a little more subtle, rocking the golden tan while the gorgeous peaches and cream Amy Adams goes with “less is more”.

Some of my favourite products to achieve gorgeous glowing skin are…

10. Chanel Soleil de Tan
9. St. Tropes Dark tanning mouse
8. Estée Lauder Day Wear sheer tint
7. Bourjois chocolate bronzer
6. Garnier summer body lotion
5. MAC eyeshadows in antique and bronze
4. Guerlain bronzing pearls
3. MAC peach Melba blush
2. Sleek blush trio
1. Nars albatross highlighter

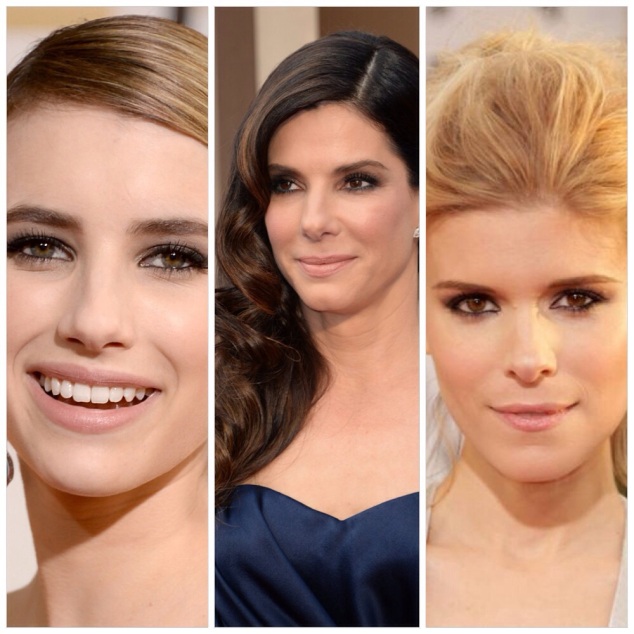
“The sultry smokes” are always a big red carpet trend and this year was no exception. However, the trend this year is all about the waterline.

20140303-185250.jpg

The gorgeous Emma Roberts (left) and Kate Mara (right) both went for the traditional black or grey but Sandra totally rocked the colour pop which is a much better way of wearing a full out lined smokey eye if your not so confident. Go for the same colour as your eye which will make the eyes appear bigger or make your eye colour shine bright by going for its opposite…

Blues= go for golds
Greens= go for warm plums
Browns= go for rich dark blues (just like Sandra)

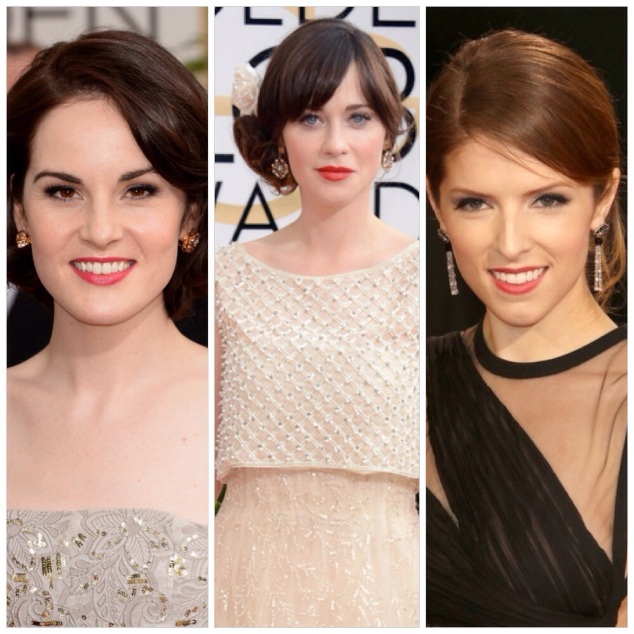
Another classic look is “The classic” it does as it says on the tin… Loads of lashes and a splash of red!

20140303-182202.jpg

This year though the reds haven’t quite been screaming just softly humming! Which makes this look much easier for all you red scardies out there to wear! Give the Revlon colour bursts a try, they come in a range of colours and textures so you’re bound to find your perfect red!

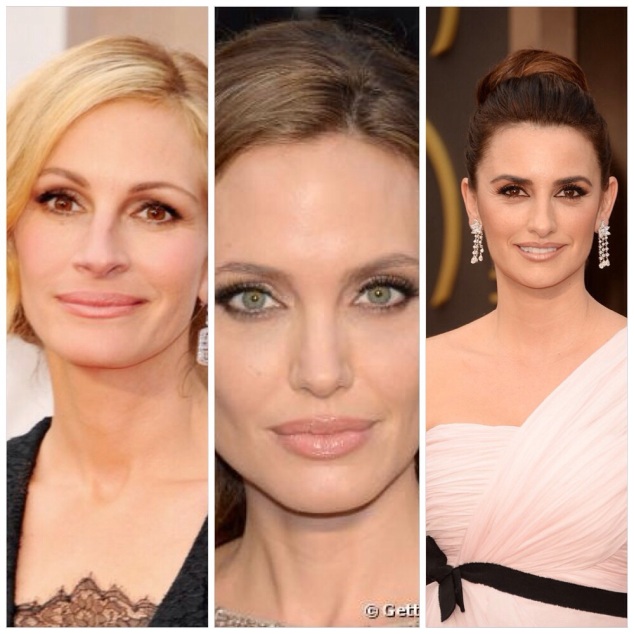
And last but certainly not least, my favourite trend is the “Dolce Vita siren” this look is all about the contouring, flawless skin and that cat eye flick…

20140303-183047.jpg

One full proof way of getting that cat eye flick is with a good set of eyelashes and my absolute go to pair are the Ardell Demi’s or Demi whispies. And perfecting that chiselled contour couldn’t be simpler with Sleek contouring palette… Or if you’re feeling extremely red carpet you could go to the queen of “Dolce Vita” international MUA Charlotte Tilbury and splash out on her version.

So I think I’ve given you guys enough to go and create your red carpet moment.. And if all else fails you know where I am 😉
You guys are awesome and I don’t know how much more I can thank you… I love you all.

Loads a lashes!

So as we (hopefully) will be soon saying goodbye to cold winter weather and hello to spring we look forward to big up-and-coming trends. And this season is going to be aaaaaall about the lashes! So grab your eyelash curlers, hunt down that elusive mascara and get to grips with those fiddly false lashes!

20140128-183728.jpg

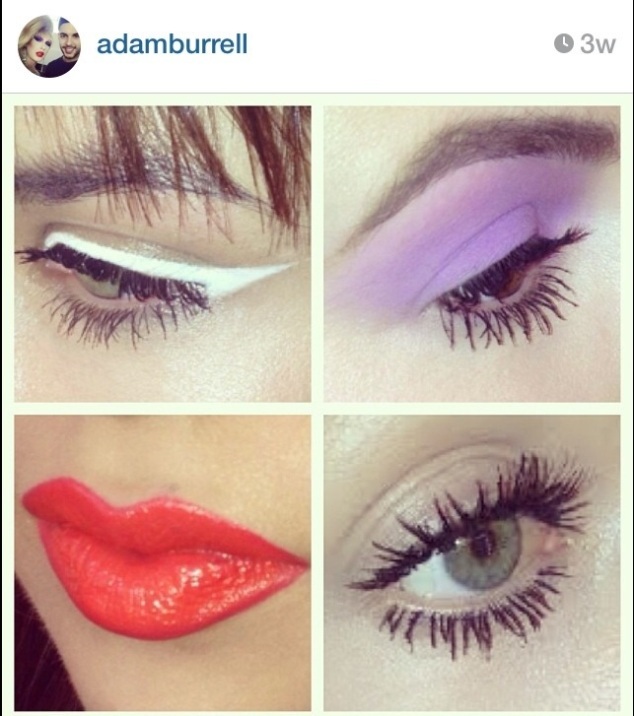
Celebrity make up artist and Little Mix’s key make up artist, Adam Burrell, posted this pic of some of the big trends and lashes are all up in there so… To help, I thought I’d point you all in the direction of some little beauty essentials that will help you achieve the same look!

20140128-183905.jpg

L’oreal and Maybelline have both launched new mascaras with loads of lashes in mind. The l’oreal mascara has a rotating wand allowing it to move around and really wiggle the brush inbetween all those lashes! The Maybelline mascara has two different wands, one big fat wand to bulk out those top lashes and a thinner wand to catch the smaller bottom lashes.

Or if you’re like me….

20140128-184046.jpg

You could load Ardell lashes in 105 on top of pre curled lashes set with a coat of MAC’s extreme dimension masacra, with a line of Barry M liner to add extra fullness at the base. And on the bottom… More lashes!!! I’ve used individual lashes inserted through my natural ones again coated with MAC mascara.

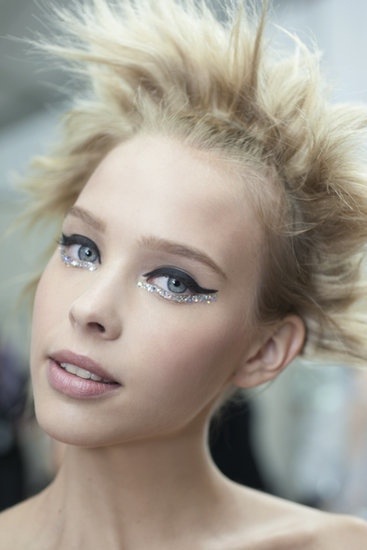
Lashes can be really fun and effective especially when you get colourful. Eye lure and Ardell both have ranges of coloured lashes which can add such an effect with little effort. And if anyone caught the Chanel haute couture spring-summer fashion show recently you could jazz those bottom lashes up with a bit of glitter!!

20140128-183128.jpg

Have fun… Ciao!!

A bright and rosy Christmas….

Hello and Happy New year!! I hope you all had a lovely Christmas!? I’m just recovering from mine! My favourite part of Christmas is when it’s all over and I can properly play with all the lovely things generous people gifted me!

I got so many wonderful make up and beauty items I thought I’d do a quick blog on them.

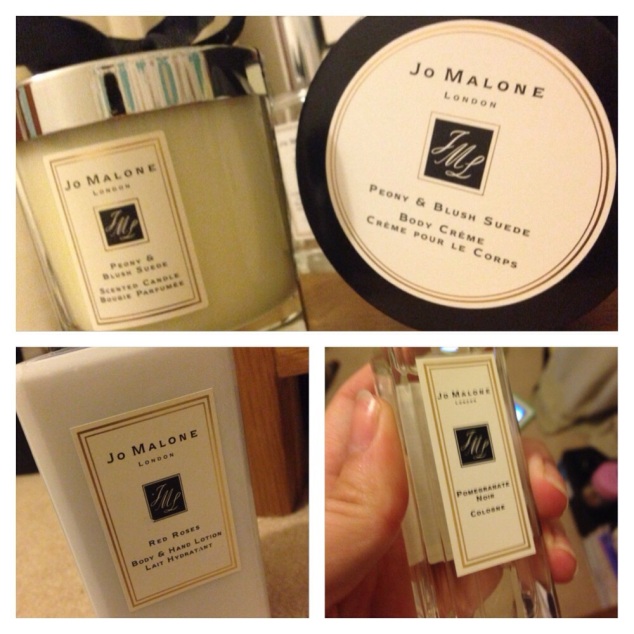
We’ll start off with the absolute hit Jo malone got! Between my wonderful mum, sister and boyfriend my body and room shall be smelling gorgeous!

20140106-185313.jpg

My favourite scents Pomegranate Noir, Peony & Blush Suede and Red Roses… See a pattern developing?

I have sooooo much make up but most of it is my kit, so when people buy me make up just for me I get so excited! So opening these little gems on Christmas Day got me more than a little excited!

20140106-185505.jpg

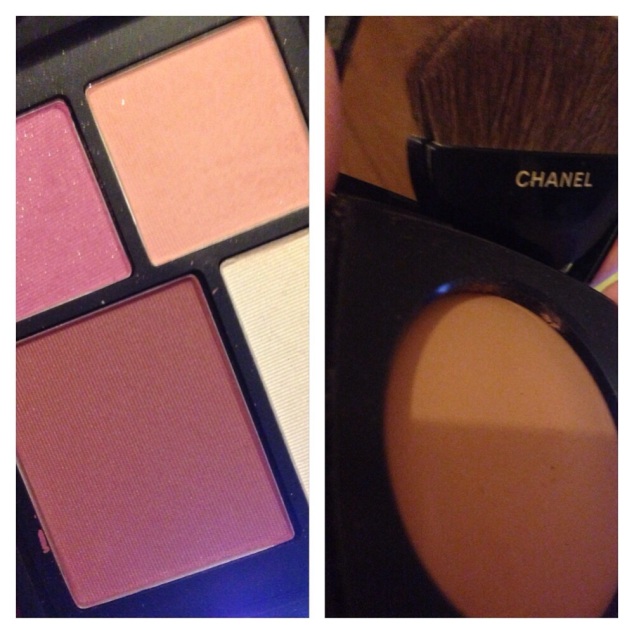
This gorgeous Nars palette comes with four of their most popular blushes, highlighters and contours. And the Chanel bronzer is a healthy glow powder which can be used to give the face a bit of colour or used more intense it is my favourite contour cosmetic!! The brush is slightly curved to make sure you get the shape of your cheek just right!

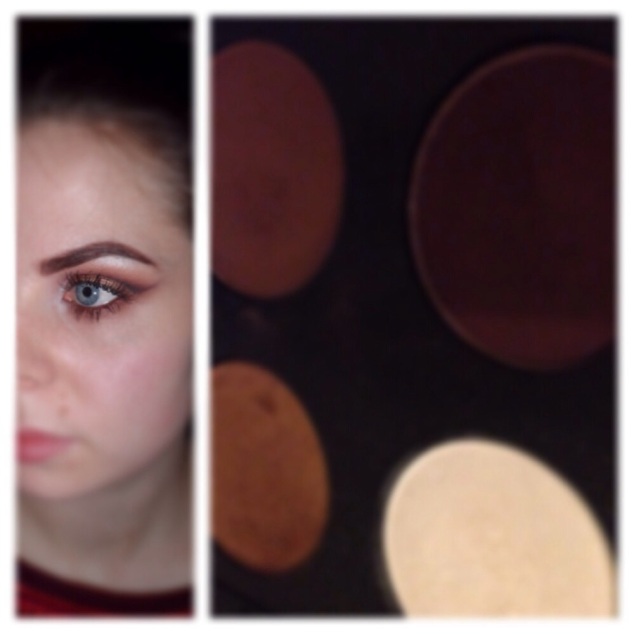
And MAC got a hit too… Snaps go out here to my boyfriend and the MAC assistant… The first colour that caught my eye is a gorgeous slightly shimmery plum, their best seller “sketch”. There’s an awesome highlighter “crystal avalanche”,a self explanatory “bronze” will match my eye colour perfectly and a matte brown “courdoroy” to do my eyebrows with! And to complete that look their best selling masacra. I couldn’t hep do a little demo for you guys with these…

20140106-185839.jpg

And saving the best till last… I think the 12 days of Christmas paid off…

20140106-191047.jpg

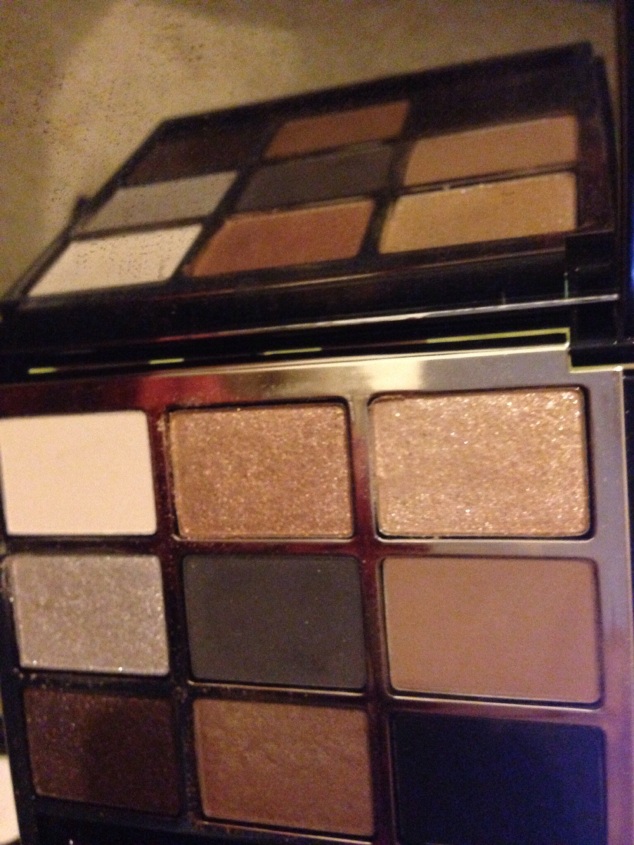
My boyfriend got me the Bobbi Brown Old Hollywood palette!!!!!!!

It’s absolutely gorgeous, a good balance of matte, sparkle, light and dark and all the colours have good pay off!

Now I haven’t done demos with all my make up because…. I am thinking of doing video tutorials… (Eek) I hate myself on video so this is massive for me but I’ve had a few people ask me about this and if you guys want it you guys can have it…. I want you guys to tell me if this is something you’ll watch, you’ll enjoy and what you guys would like to see?

So as always thanks for taking the time to read this and let me know what you think.
Ciao!!

On the eighth day of Christmas…

“On the Eighth Day of Christmas my True Love gave to me…”

20131126-121508.jpg

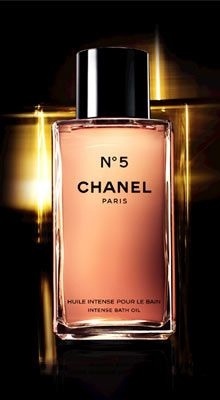
The limited edition No.5 bath oil! I am a huge fan of Coco when it comes to winter, a lovely bit of spice when it’s cold. But you can not beat a bit of No.5 when it comes to christmas. The bath oil is so fragrant a small amount fills the room with the subtle scent of No.5. When I worked for Chanel even people that weren’t fond of the classic No.5 loved this… It smells completely different. Much more delicate. And the hoarder in me knows that when your finished the beautiful collector’s glass bottle can be decanted with anything else!!

Chanel always has such beautiful packaging so treat your loved one and add something else from the range (which has such beautiful and full range items.) and have it packaged in a beautiful box. I have wrapped hundreds of Chanel boxes and have always wanted to receive one for myself… Santa… You listening??

On the fourth day of Christmas…

“On the Fourth Day of Christmas My True
Love gave to me….”

20131122-124329.jpg

Absolutely anything from the Chanel Christmas 2013 collection Nuit Infinie de Chanel!!

I am totally biased when it comes to Chanel but I really don’t think no one does Christmas quite like them. Christmas screams No.5 and red lipstick! The new collection is all things Christmassy… There’s sparkles, there’s glitter and there’s lots and lots of colour! I could tell you all about the collection but I thought I would leave that up to Chanel spokeswoman and International make up artist Lisa Eldridge. Now Lisa isn’t my favourite tutorial artist out there (you’ll know what I mean..) but she is a fantastic make up artist, shows you most of the items in the collections (including the gorgeous limited edition) and how to apply them in an easy way for you to all follow. She doesn’t however show you there is a gorgeous nude lipstick (217 Radiese) for all of you out there that prefer your festive season a bit more smokey than red and green!

Here’s the link to Lisa’s tutorial
http://m.youtube.com/watch?v=UQr9rj7x8G4

And I couldn’t help but show you the gorgeous visual from the collection and take a moment to watch the beautiful collection video!
http://tablet.chanel.com/en_US/fragrance-beauty/Makeup-88484

Chanel

The new season Chanel collection “l’ete papillon de Chanel” hit the counters last Friday and personally I think it’s awesome! Having worked for Chanel for almost 5 years, I still hold the company dear to my heart and still have a soft spot for their new collection releases, but this one speaks for its self. Based on the effect and colours that butterfly wings can give the collection holds the typical blue and coral tones that most of the cosmetics summer collections produce,  however… Peter Phillips (global creative make up artist) has turned them on their head! Opting for a more electric blue and a punchy orange than coral.


One of my favourite parts to the collection are a range of cream eyeshadows “Stylo Eyeshadow”. These eyeshadows come in a solid twist up pen and can be drawn onto the eyes. They can be used. As a shadow on their own or as an incredible base. The texture is cool and creamy, on first application it feels wet giving the eye a cooling sensation. Perfect for our summer sun… Ha. They come in a fan range of colours, starting from the top “Black Stream” a crystallised jet black, “Blue Bay” an electric blue, “Jade Shore” a jade, mint green, “Moon River” a gorgeous metallic taupe, “Cool Gold” a slightly yellow based gold and finally “Pink Lagoon” a soft baby pink.

photo (31)

Nails and lips tend to be the summer fling we all have, but this year Peter has tried to divert us. With a gorgeous range of eyeshadows paired with the most beautiful coloured mascaras! Now looking at the picture there’s obviously one that’s screaming out at you… Yellow. I don’t think we’re quite there in terms of wearing yellow mascara but it looks pretty… The rest of the collection however is stunning. These coloured mascaras can be worn on their own for maximum intensity or on the tips of the lashes over your normal black. Coloured mascaras are a great alternative to eyeshadow, using the right colour can really make your eyes stand out and it’s much less hard work!

photo (32)

The rest of the collection boasts 3 gorgeous new nail polishes. 2 metallic blues, one turquoise “Azure” and one royal “Bel Argus”, and one bright zesty orange “Lilis”. There are 5 lip items, all slightly creamy or glossy textured, both textures come in a range of soft pinks and peaches with a hit of a hot pink. And lastly another gorgeous eye product, a waterproof eye liner in a royal marine blue. The nails and lips are all perfect colours for summer but I definitely think in this collection the eyes are doing all the talking.

When I worked for Chanel, I was incredibly lucky. I worked for one of the top fashion houses in the world created by one of the most incredible woman in the world. I had the opportunity to train at the Chanel academy and work with some of the most talented and successful people in this industry. I was trained as a specialist under the Peter Phillips rule and I feel quite sad that I find this collection absolutely gorgeous when it’s a shame it’s his last one for Chanel.

If you haven’t been in and bought the whole collection… Or at least seen it, please do with caution!! May result in a loss of your well earned money! Thanks for listening, arrivederci!

Lana….

Make up artists all over the world have their vintage bells ringing and are running for their red lipsticks! With the release of “The Great Gatsby” it’s brought on a chorus of cry’s for vintage make up. So linking in quite nicely with my last blog I thought I’d do a tutorial of the beautiful Lana Del Rey in her latest song “Young and Beautiful” the soundtrack to “The Great Gaysby”.

I used Chanel’s perfection lumiere as my base. This range comes in 3 shade categories, I wanted something a bit paler with a pink undertone to match my skin tone so I went for the rose category in number 22. The foundation has a very wearable matte texture, not heavy and thick like some can be. After building up my required coverage I went straight to the eyes. I used a Maybelline matte brown eyeliner pencil on a brush as a base on my eyelid all the way up to my crease and underneath. I used a clean brush to buff it out and then applied a warm toned brown to set the  liner. Next I used a light beige in my inner corner working over the mobile lid, keeping the intensity of the brown base on my socket. A lot of vintage make ups look like they have a lot on the eyes but it’s the intensity in the lash line which gives this impression. So I went straight in with MAC black tracks gel liner, using a pencil brush I buffed a small amount over my lash line, I didn’t want any harsh or heavy lines. I used the leftover on my brush on my lower lash line.  Apply two generous coats of max factor false lash effect mascara… Simples! (remember to clean up any fall out underneath and add a little concealer to brighten!)

SAM_0397 (2)

With the lips I used Bloom lip liner (which incidentally cost me £1 at super drug!), I used a darker blue toned red. I use this to outline the whole lip, paying close attention to rounding my Cupid’s bow. Lana has gorgeous full lips, if you’re lips are on the thinner side the best trick is to darken or add more intensity to the outer corner of your lip liner creating an illusion and allowing the front of your lips to pop giving a more 3d effect. I used a generous amount of liner, so when I applied my favourite Lancome limited edition lipstick over the top it gave a better blend into the lip liner. To finish off I used a blusher with quite a heavy red pigment to contour my cheek bones… Find your cheek bone and push the brush under your cheek and brush forward, creating a shadowing effect allowing the cheek bone to pop forward. Using blusher this way sculpts the face and gives colour without overpowering the balance of the make up. I haven’t named many products because its best just to use what you have and what matches your skin tone. However when it comes to vintage make up matte gives a better finish, everything I used is matte.

SAM_0399

In the video Lana has the cutest crystallized tear drops… I had some of these in black so I added one to my cheek. These can be found in any craft stores, the ones I bought were for card making so anything will do. They cost £1.50 and I used a small amount of lash glue to apply them, this peals quite easily off the skin so you can be really creative!

I really had fun doing this tutorial, Lana Del Ray is gorgeous so I hope I did her proud! If you haven’t watched the video….

… That’s the link, check it out! Sooo beautiful. Thanks for listening, hasta luego!